アンドロイドでバーコード読み取り
いまさらですが、アンドロイドでバーコード読み取りをやってみます。
ライブラリとして使用するのは、SATCHのシナリオサンプルとZXing(ゼブラ・クロッシング)の2つです。
ZXing(ゼブラ・クロッシング)を使えば、一次元も二次元(QRコード)も両方いけます。
SATCHの一次元と二次元のコード・サンプルを統合してみました。
目次
ZXing(ゼブラ・クロッシング)を使って、バーコード読み取り
ZXing(ゼブラ・クロッシング)過去バージョンのダウンロード(old version)
SATCHを使って、バーコード読み取り
SATCHの一次元と二次元のコード・サンプルを統合
SATCH側でオートフォーカス設定
TOP
ZXing(ゼブラ・クロッシング)を使って、バーコード読み取り
現在対応しているフォーマットは以下の通り
UPC-A and UPC-E
EAN-8 and EAN-13
Code 39
Code 93
Code 128
ITF
Codabar
RSS-14 (all variants)
QR Code
Data Matrix
Aztec ('beta' quality)
PDF 417 ('alpha' quality)
ZXing(ゼブラ・クロッシング)はここからダウンロード
現在のバージョンは2.0(2012/07/28) 現在のバージョンは2.2(2013/09/13)
以下の記述は2.0をターゲットにしています。2.0が必要な方はここからDLしてください。
Google Playで配布されている「QRコードスキャナー」もこのライブラリーの製造元が作ってます。
作り方
以前はantでリビルドする工程があったようですが、現在は極シンプルです。
ダウンロードして解凍したもので、プロジェクトに必要なのは以下の3つ。
●coreフォルダーの中のcore.jar
●javaseフォルダーの中のjavase.jar
●android/src/com/google/zxing/client/androidフォルダーの中のPlanarYUVLuminanceSource.java
main.xmlを記述する際に参考になるのが、android/res/layoutフォルダーの中のcapture.xml
では、Eclipseを起動してプロジェクトを作成してみます。
File -> New -> Otherで新規プロジェクト作成。
ついで、新しいパッケージも作っておきます。
File -> New -> Packageで名前は、「com.google.zxing.client.android」です。
プロジェクトフォルダーのsrc/com/google/zxing/client/androidフォルダーにPlanarYUVLuminanceSource.javaをコピー。
さらに、プロジェクトフォルダーにlibsという新規フォルダーを作成して、core.jarとjavase.jarをコピー。
Eclipseに戻って、プロジェクトをRefresh。
念のため、プロジェクトのPropertiesで、ResourceのText file encodingをUTF-8にしておく。
libsのcore.jarとjavase.jarのBuild pathをとおしておく。
これでプロジェクトのベースは完了。後はコーディングです。
【AndroidManifest.xml】
画面の向きをLandscapeにして、cameraを設定しておきます。
    <!-- 略 -->

<activity
            android:name=".MainActivity"
            android:label="@string/title_activity_main"
            android:screenOrientation="landscape" >
            <intent-filter>
                <action android:name="android.intent.action.MAIN" />

                <category android:name="android.intent.category.LAUNCHER" />
            </intent-filter>
</activity>

    <!-- 略 -->

<uses-permission android:name="android.permission.CAMERA" />
    <!-- オートフォーカスを設定します -->
    <uses-feature android:name="android.hardware.camera" />
    <uses-feature android:name="android.hardware.camera.autofocus" />

    <!-- 略 -->
【main.xml】
res/layoutフォルダーの中のmain.xml。
ZXing2.0の中のandroid/res/layoutフォルダーの中のcapture.xmlを参考に。
<?xml version="1.0" encoding="utf-8"?>
<FrameLayout xmlns:android="http://schemas.android.com/apk/res/android"
    android:layout_width="fill_parent"
    android:layout_height="fill_parent"
    android:orientation="vertical" >

    <SurfaceView
        android:id="@+id/preview_view"
        android:layout_width="fill_parent"
        android:layout_height="fill_parent" />

    <RelativeLayout
        android:layout_width="fill_parent"
        android:layout_height="fill_parent" >

        <View
            android:id="@+id/viewfinder_view"
            android:layout_width="400dip"
            android:layout_height="200dip"
            android:layout_centerVertical="true"
            android:layout_centerHorizontal="true"
            android:background="#55ff6666" />

    </RelativeLayout>

</FrameLayout>
【メインのActivity.java】
パッケージ名やら、xxxxxのところは適当に書き換えてください。
package com.google.zxing.client.xxxxx;

import java.io.IOException;

import com.google.zxing.client.android.PlanarYUVLuminanceSource;


import com.google.zxing.BinaryBitmap;
import com.google.zxing.MultiFormatReader;
import com.google.zxing.Result;
import com.google.zxing.common.HybridBinarizer;

import android.app.Activity;
import android.app.AlertDialog;
import android.app.Dialog;
import android.content.Context;
import android.content.DialogInterface;
import android.graphics.Point;
import android.hardware.Camera;
import android.os.Bundle;
import android.util.Log;
import android.view.Display;
import android.view.MotionEvent;
import android.view.SurfaceHolder;
import android.view.SurfaceView;
import android.view.View;
import android.view.Window;
import android.view.WindowManager;
import android.widget.Toast;

import android.view.KeyEvent;


public class MainActivity extends Activity implements SurfaceHolder.Callback, Camera.PreviewCallback, Camera.AutoFocusCallback {
    private static final String TAG = "ZXingBase";

    private static final int MIN_PREVIEW_PIXCELS = 320 * 240;
    private static final int MAX_PREVIEW_PIXCELS = 800 * 480;
    private Camera myCamera;
    private SurfaceView surfaceView;

    private Boolean hasSurface;
    private Boolean initialized;

    private Point screenPoint;
    private Point previewPoint;

    private static final int DIALOG_EXIT = 0;


    @Override
    public void onCreate(Bundle savedInstanceState) {
        super.onCreate(savedInstanceState);

        Window window = getWindow();
        window.addFlags(WindowManager.LayoutParams.FLAG_FULLSCREEN);
        requestWindowFeature(Window.FEATURE_NO_TITLE);

        hasSurface = false;
        initialized = false;

        setContentView(R.layout.activity_main);


    }

    @Override
    protected void onResume() {
        super.onResume();

        surfaceView = (SurfaceView)findViewById(R.id.preview_view);
        SurfaceHolder holder = surfaceView.getHolder();
        if (hasSurface) {
            initCamera(holder);
        } else {
            holder.addCallback(this);
            holder.setType(SurfaceHolder.SURFACE_TYPE_PUSH_BUFFERS);
        }
    }

    @Override
    protected void onPause() {
        closeCamera();
        if (!hasSurface) {
            SurfaceHolder holder = surfaceView.getHolder();
            holder.removeCallback(this);
        }
        super.onPause();
    }


    @Override
    public void surfaceCreated(SurfaceHolder holder) {
        if (!hasSurface) {
            hasSurface = true;
            initCamera(holder);
        }
    }

    @Override
    public void surfaceDestroyed(SurfaceHolder holder) {
        hasSurface = false;
    }

    @Override
    public void surfaceChanged(SurfaceHolder holder, int format, int width, int height) {

    }

    @Override
    public void onAutoFocus(boolean success, Camera camera) {
        if (success)
            camera.setOneShotPreviewCallback(this);
    }


    @Override
    public boolean onKeyDown(int keyCode, KeyEvent msg){

        switch(keyCode){

            case android.view.KeyEvent.KEYCODE_MENU:
            case android.view.KeyEvent.KEYCODE_CAMERA:

                if (myCamera != null) {

                        Camera.Parameters parameters = myCamera.getParameters();
                        if (!parameters.getFocusMode().equals(Camera.Parameters.FOCUS_MODE_FIXED)) {
                            myCamera.autoFocus(this);
                        }

                }

                return true;

            case android.view.KeyEvent.KEYCODE_BACK :
                showDialog( DIALOG_EXIT );
                return true;
        }
        return false;
    }

    /** Camera.PreviewCallback */
    @Override
    public void onPreviewFrame(byte[] data, Camera camera) {
        View finderView = (View)findViewById(R.id.viewfinder_view);

        int left = finderView.getLeft() * previewPoint.x / screenPoint.x;
        int top = finderView.getTop() * previewPoint.y / screenPoint.y;
        int width = finderView.getWidth() * previewPoint.x / screenPoint.x;
        int height = finderView.getHeight() * previewPoint.y / screenPoint.y;

        PlanarYUVLuminanceSource source = new PlanarYUVLuminanceSource(data,previewPoint.x,previewPoint.y,left,top,width,height,false);

        BinaryBitmap bitmap = new BinaryBitmap(new HybridBinarizer(source));
        MultiFormatReader reader = new MultiFormatReader();
        try {
            Result result = reader.decode(bitmap);
            Toast.makeText(this, result.getText(), Toast.LENGTH_LONG).show();
        } catch (Exception e) {
            //Toast.makeText(this, "error: " + e.getMessage(), Toast.LENGTH_LONG).show();
            Toast.makeText(this, "読み取れませんでした: " + e.getMessage(), Toast.LENGTH_LONG).show();
        }
    }

    //---------------------------------------------------------------------------------

    private void initCamera(SurfaceHolder holder) {
        try {
            openCamera(holder);
        } catch (Exception e) {
            Log.w(TAG, e);
        }
    }

    private void openCamera(SurfaceHolder holder) throws IOException {
        if (myCamera == null) {
            myCamera = Camera.open();
            if (myCamera == null) {
                throw new IOException();
            }
        }
        myCamera.setPreviewDisplay(holder);

        if (!initialized) {
            initialized = true;
            initFromCameraParameters(myCamera);
        }

        setCameraParameters(myCamera);
        myCamera.startPreview();
    }


    private void closeCamera() {
        if (myCamera != null) {
            myCamera.stopPreview();
            myCamera.release();
            myCamera = null;
        }
    }


    private void setCameraParameters(Camera camera) {
        Camera.Parameters parameters = camera.getParameters();

        parameters.setPreviewSize(previewPoint.x, previewPoint.y);
        camera.setParameters(parameters);
    }

    private void initFromCameraParameters(Camera camera) {
        Camera.Parameters parameters = camera.getParameters();
        WindowManager manager = (WindowManager)getApplication().getSystemService(Context.WINDOW_SERVICE);
        Display display = manager.getDefaultDisplay();
        int width = display.getWidth();
        int height = display.getHeight();

        if (width < height) {
            int tmp = width;
            width = height;
            height = tmp;
        }

        screenPoint = new Point(width, height);
        Log.d(TAG, "screenPoint = " + screenPoint);
        previewPoint = findPreviewPoint(parameters, screenPoint, false);
        Log.d(TAG, "previewPoint = " + previewPoint);
    }


    private Point findPreviewPoint(Camera.Parameters parameters, Point screenPoint, boolean portrait) {
        Point previewPoint = null;
        int diff = Integer.MAX_VALUE;

        for (Camera.Size supportPreviewSize : parameters.getSupportedPreviewSizes()) {
            int pixels = supportPreviewSize.width * supportPreviewSize.height;
            if (pixels < MIN_PREVIEW_PIXCELS || pixels > MAX_PREVIEW_PIXCELS) {
                continue;
            }

            int supportedWidth = portrait ? supportPreviewSize.height : supportPreviewSize.width;
            int supportedHeight = portrait ? supportPreviewSize.width : supportPreviewSize.height;
            int newDiff = Math.abs(screenPoint.x * supportedHeight - supportedWidth * screenPoint.y);

            if (newDiff == 0) {
                previewPoint = new Point(supportedWidth, supportedHeight);
                break;
            }

            if (newDiff < diff) {
                previewPoint = new Point(supportedWidth, supportedHeight);
                diff = newDiff;
            }
        }
        if (previewPoint == null) {
            Camera.Size defaultPreviewSize = parameters.getPreviewSize();
            previewPoint = new Point(defaultPreviewSize.width, defaultPreviewSize.height);
        }

        return previewPoint;
    }

    //-----------------------------
    protected Dialog onCreateDialog(int id) {
        Dialog dialog;
        switch(id) {
            case DIALOG_EXIT:
            {
                AlertDialog.Builder builder = new AlertDialog.Builder(this);
                builder.setMessage(
                    "Really want to quit the application?"
                )
                .setCancelable(true)
                .setPositiveButton("Yes", new DialogInterface.OnClickListener() {
                    public void onClick(DialogInterface dialog, int id) {
                        finish();
                    }})
                    .setNegativeButton("No", new DialogInterface.OnClickListener() {
                        public void onClick(DialogInterface dialog, int id) {
                            dialog.cancel();
                        }});
                    dialog = builder.create();
                    break;
            }
            default:
            dialog = null;
        }
        return dialog;
    }
}
使い方
本家のQRコードスキャナーとは違います。
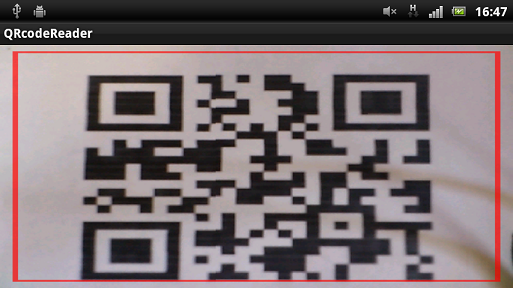
起動して、中央の赤っぽい枠の中にQRコードを写しこんだら、メニュかカメラ撮影のハードキーを押します。
フォーカスが当たれば読み取ります。
こんな感じ。
TOP
ZXing(ゼブラ・クロッシング)過去バージョンのダウンロード
ZXing 2.0
ZXing 2.1
ZXing 2.2
もっと古いバージョンはこちらから
TOP
SATCHを使って、バーコード読み取り
SATCHはAR(拡張現実)アプリ作成用のSDKですが、トラッキング用のマーカー画像をいちいち作るのが面倒
な場合、バーコードで代用すればいいんじゃないか?という程度の発想です。
これはIKEAのカタログARのまねっこをしてみようという思いつきの前段です。
(ほんちゃんのLuaはQRコード読み取りと、画像トラッキング・3Dオブジェクト表示の統合コードになります。現在、QRコード読み取りと画像トラッキングを単一コードで実行するまでの動作確認の検証は終了してますんで、もう少々お待ちください。)
以下は、一次元バーコードのコードですが、二次元(QRコード)の場合も、ほぼ同様です。
ただ、二次元のコードには、local visor = Overlay(getCurrentScene():getObjectByName("BarCodeVisor"))のコードが無いので、追加してください。
一次元バーコード・リーダー
二次元バーコード・リーダー
SATCHのシナリオは、SATCH Developers siteの"TESTS"サンプルの中の「testBarCodePlugin」と「testBarCodePlugin2D」を使います。
独自アプリを作りたい場合は、dpdファイルの中のapplicationidを書き換える必要があります。
ここでは、Javaとの通信をやる必要があったので、以下のようにluaにコードを追加しています。
【Lua】
-- initialize the linear visor position
local lOS = getOSType()
--if (lOS == TI_OS_IPHONEOS) then
    local visor = Overlay(getCurrentScene():getObjectByName("BarCodeVisor"))
    --visor:setRotate(1.57)
--end

-- initialize the barcode reader
local text = Text2D(getCurrentScene():getObjectByName("text"))
local componentInterface = getComponentInterface()

local lBarCodePlugin = nil

local bIsOK = true -- flag reflecting if all OK or something wrong

local eCode = 0 -- return error code variable
local vidcap_width = 0
local vidcap_height = 0

local prev_code = ""


local tRequestedCodes = {
    "UPCA"    ,
    "EAN13"      ,
    "UPCE"    ,
    "EAN8"    ,
    "CODE39"    ,
    "CODE128" ,
    "ITF"  ,
--    etc. etc.
}

-- products cross-table
Products_CrossTable = {
    -- put here your products, in the following form:
    -- [ "UPCA;123456789012"  ] = "Toto" ,
    -- [ "EAN13;1234567890123"  ] = "Tata" ,
}

-- helper handle-result function
    function HR(in_Bool, in_sMessage)
        local res = true
        if ( not in_Bool ) then
            text:setText(in_sMessage)
            res = false
        end
        return res
    end


-- initialize the text output
    text:setText("")
    text:setVisible(true)

-- determine if the runtime has the BarCodePluginManager
    if (bIsOK) then
        bIsOK = HR( getBarCodePluginManager, "ERROR : getBarCodePluginManager not disponible" )
    end
    if (bIsOK) then
        lBarCodePlugin = getBarCodePluginManager()
        bIsOK = HR ( lBarCodePlugin, "ERROR : BarCodePlugin instance is nil" )
    end

-- link the BarCode plugin to the videocapture (use it coupled to the given videocapture)
    if (bIsOK) then
        eCode = lBarCodePlugin:linkToVideoCapture( getCurrentScene():getObjectByName("vidCap") )
        bIsOK = HR( 0 == eCode, "ERROR : BarCodePlugin : could not link to videocapture" )
    end
    if (bIsOK) then
        repeat
            eCode, vidcap_width, vidcap_height = lBarCodePlugin:getLinkedVideoCaptureDimensions( )
            -- eCode can be signaled unitl we receive 1st frame
            if ( HR( 0 == eCode, "ERROR : BarCodePlugin : could not get videocapture dims" ) ) then
                text:setText("") -- back to normal
            end
            coroutine.yield()
        until ( 0 == eCode )
    end

-- decide Region Of Interest based on the videocapture frame dimensions
    if (bIsOK) then
        -- whole image
        --local roiX = 0
        --local roiY = 0
        --local roiDX = vidcap_width
        --local roiDY = vidcap_height

        -- only the center part
        local strip_dx = vidcap_width
        local strip_dy = 40
        --
        local roiX = ( vidcap_width  - strip_dx ) / 2
        local roiY = ( vidcap_height - strip_dy ) / 2
        local roiDX = strip_dx
        local roiDY = strip_dy
        --
        eCode = lBarCodePlugin:setRegionOfInterest( roiX, roiY, roiDX, roiDY )
        bIsOK = HR( 0 == eCode, "ERROR : BarCodePlugin : could not set ROI" )
    end

-- decide if the required code(s) is (are) within the list of supported codes
    local tSup -- variable to store supported codes
    if (bIsOK) then
        eCode, tSup   = lBarCodePlugin:getSupportedCodes( )
        bIsOK = HR( 0 == eCode, "ERROR : BarCodePlugin : could not get supported codes" )
        if (bIsOK) then -- only for info : log supported codes
            --LOG ("INFO : BarCode plugin supports:")
            for k2,codeSup in pairs(tSup) do
                --LOG ("    " .. codeSup)
            end
        end
    end
    if (bIsOK) then
        --LOG("INFO : Determine if required codes are supported")
        for k,codeReq in pairs(tRequestedCodes) do
            --LOG("Required = " .. codeReq)
            local bFound = false;
            for k2,codeSup in pairs(tSup) do
                if (codeReq == codeSup) then
                    --LOG ("       found!")
                    bFound = true
                    break
                end
            end
            bIsOK = HR( bFound, "BarCodePluginManager : no detector for : " .. codeReq )
            if (not bIsOK) then
                --LOG ("       ERROR : not found!")
                break
            end
        end
    end

-- set the BarCodes we're searching for
    if (bIsOK) then
        eCode = lBarCodePlugin:setRequestedCodes( tRequestedCodes )
        bIsOK = HR( 0 == eCode, "ERROR : BarCodePlugin : could not set requested codes" )
    end

-- init done, ready for main loop
    coroutine.yield()
    if (bIsOK) then
        local i = 0
        repeat
            i = i + 1


            --text:setText("out")
            --LOG("out")


            eCode, result = lBarCodePlugin:detect( )
            bIsOK = HR( 0 == eCode, "ERROR : BarCodePlugin : on detect()" )

            if (bIsOK) then
                for k,v in pairs(result) do
                    local ct = Products_CrossTable[ v ]
                    if ( not (nil == ct) ) then
                        --text:setText( ct )

                    else -- not stored in our data base
                        if prev_code ~= v then
                            --if (visor:getVisible()) then
                                --LOG("visible")
                                text:setText(v)
                                LOG("found")
                                visor:setVisible(false)
                                componentInterface:executeAppFunc("setTrackingStatus",v)
                                prev_code = v
                            --end


                        end
                    end
                end
            end

            isCommand, command = componentInterface:pullCommand()
            if isCommand then
                if command["CommandName"] == "visor" then
                    --
                    --componentInterface:executeAppFunc("sendLog","receive command")

                    local s_type = command["arg0"]
                    if s_type == "show" then
                        visor:setVisible(true)
                        prev_code = ""
                        text:setText("")
                    elseif s_type == "hide" then
                        visor:setVisible(false)
                    end

                end
            end

        until coroutine.yield()
    end

-- end of file --
注!
SATCHのバーコード読み取りのサンプルは「おまけ」程度の扱いで、一次元バーコードの場合、しばしば検出に失敗します。
例外処理用のコードを独自に実装する必要があります。
ここでは、未実装ですが、以下のような現象があります。
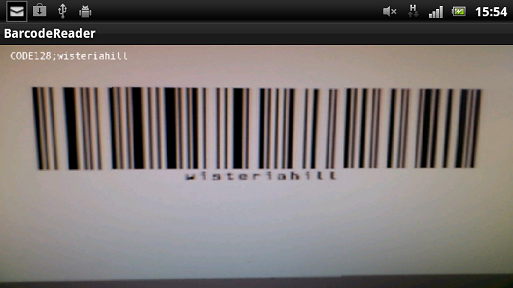
例えば、Code128で作成した場合、読み取りが正常なら「CODE128;xxxxx」という形で結果が返るはずですが、
「ENA13;yyyyyyyy」や、CODE128だが読み取った内容に文字化けがある....など。
注!
testBarCodePluginのコードは、何かのタイミング(何のタイミングかは未だわかりませんが)でdpdファイルが書き換えられて、2度目にSATCH で読み込むと 正常に動作しない場合があります。
もし不具合が発生した場合、dpdファイルに以下のタグを追加してみてください。
<platform target="windows">
            <camera name="camera" position="{0.000000, 0.000000, 75.000000}" orientation="{1.000000, 0.000000, 0.000000, 0.000000}" visible="true" rendergroup="50" scale="{1.000000, 1.000000, 1.000000}" visibilitymask="-1" fovy="0.785398" nearclip="1.000000" farclip="10000.000000" aspectratio="1.333333" />
        </platform>
        <platform target="android">
            <camera name="camera" position="{0.000000, 0.000000, 75.000000}" orientation="{1.000000, 0.000000, 0.000000, 0.000000}" visible="true" rendergroup="50" scale="{1.000000, 1.000000, 1.000000}" visibilitymask="-1" fovy="0.785398" nearclip="1.000000" farclip="10000.000000" aspectratio="1.333333" />
        </platform>
        <platform target="iPhoneOS">
            <camera name="camera" position="{0.000000, 0.000000, 75.000000}" orientation="{1.000000, 0.000000, 0.000000, 0.000000}" visible="true" rendergroup="50" scale="{1.000000, 1.000000, 1.000000}" visibilitymask="-1" fovy="0.785398" nearclip="1.000000" farclip="10000.000000" aspectratio="1.333333" />
        </platform>
        <platform target="macOS">
            <camera name="camera" position="{0.000000, 0.000000, 75.000000}" orientation="{1.000000, 0.000000, 0.000000, 0.000000}" visible="true" rendergroup="50" scale="{1.000000, 1.000000, 1.000000}" visibilitymask="-1" fovy="0.785398" nearclip="1.000000" farclip="10000.000000" aspectratio="1.333333" />
        </platform>
Eclipse側でのコード
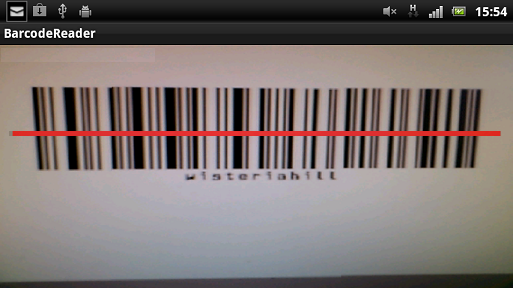
このサンプルでは、バーコード読み取った場合、LUA側で文字を表示させ、赤い線のガイドラインを隠しています。
再度読む場合は、メニュのハードキーを押して赤いガイドラインを表示させています。
Java側では以下のコードを使っています。
@Override
        public boolean onKeyDown(int keyCode, KeyEvent msg){

            switch(keyCode){
                case android.view.KeyEvent.KEYCODE_BACK :
                showDialog( DIALOG_EXIT );
                return true;

                case android.view.KeyEvent.KEYCODE_CAMERA :
                case android.view.KeyEvent.KEYCODE_MENU :

                    String[] args = new String[1];

                    args[0] = "show";

                    _kddiComponent.enqueueCommand("visor", args);


                    return true;
            }
            return false;
        }
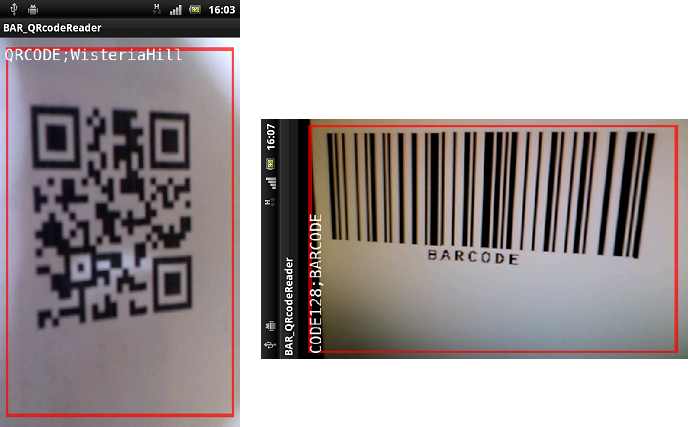
こんな風に、赤いガイドライン(Visorというらしいです)をバーコードに合わすと......
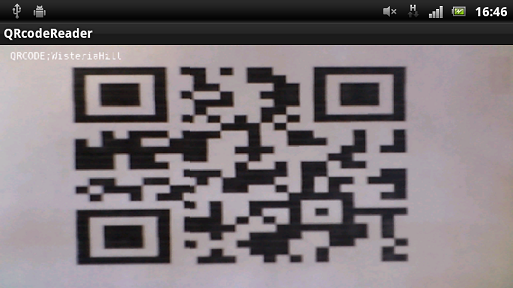
読みとった後、Visorを隠して、読み取り内容を表示。
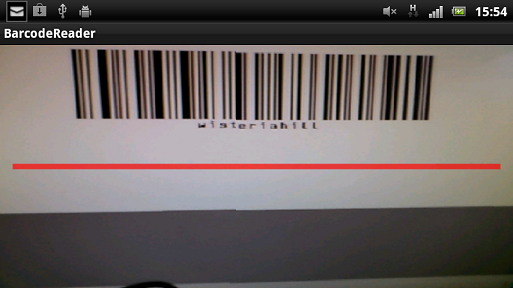
メニュのハードキーを押して、再度Visorを表示。
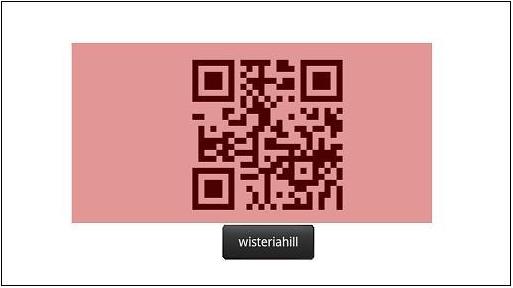
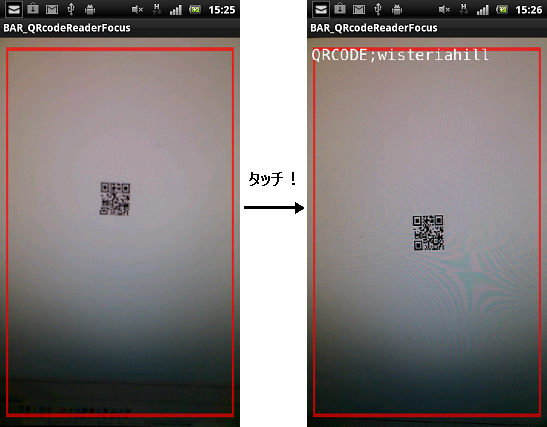
二次元(QRコード)の場合は、こんな感じ。
TOP
SATCHの一次元と二次元のコード・サンプルを統合
SATCHの一次元バーコード読み取りとQRコード読み取りのサンプルが分かれていたので1つにしてみました。
といっても、そんな難しい話じゃないんですが.....。
ベースは2次元(QRコード)読み取りのサンプルです。
Visorは四角形のやつで、読み取り範囲も大きな矩形範囲を読み取るってことにしときます。
コードの以下の部分はそのままにしときます。
---------------------------------------------------------
-- decide Region Of Interest based on the videocapture frame dimensions
    if (bIsOK) then
        -- whole image

        -- only the center part
        local rect_dx = vidcap_width  - 40
        local rect_dy = vidcap_height - 40
        --
        local roiX = ( vidcap_width  - rect_dx ) / 2
        local roiY = ( vidcap_height - rect_dy ) / 2
        local roiDX = rect_dx
        local roiDY = rect_dy
        --
        eCode = lBarCodePlugin:setRegionOfInterest( roiX, roiY, roiDX, roiDY )
        bIsOK = HR( 0 == eCode, "ERROR : BarCodePlugin : could not set ROI" )
    end
---------------------------------------------------------
以下のように、配列に1次元バーコードを追加
local tRequestedCodes = {
    "QRCODE"    ,
    "UPCA"    ,
    "EAN13"      ,
    "UPCE"    ,
    "EAN8"    ,
    "CODE39"    ,
    "CODE128" ,
    "ITF"  ,
--    etc. etc.
}
はやい話、コレだけです。
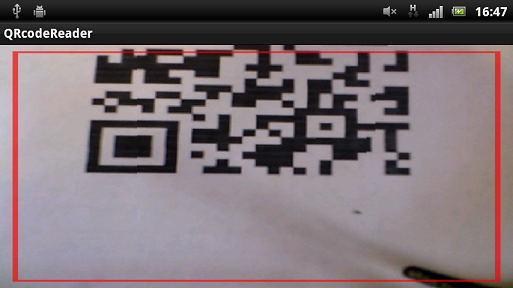
こんな感じ。
1次元バーコードの読み取りの場合、横向き(Landscape)にした方が読みとりやすいです。
インストール
TOP
SATCH側でオートフォーカスの設定
オートフォーカスの設定はわりと簡単。
使うのは、videoConfig_android_backcam_320x240_15fps.xmlファイルです。
サンプルTESTSのtestFocusVideoにあります。
こんなファイル
【SATCH Studio】
cameraを選択。
まず、Calibration fileにvideoConfig_webcam_640x480_15fps.xmlが読み込まれているのを確認。
Alternative platformにチェックを入れて、androidの欄に、videoConfig_android_backcam_320x240_15fps.xmlを入力して、
Set initial valuesをクリック。
以上です。
こんな感じ。
画面をタッチすることで、オートフォーカスが起動します。
インストール
アプリをQRコードからインストールする方法はコチラを参照
TOP